DIY Vintage Window Frame Sign
/
If I were to be honest, I'm one of those girls who hesitates to set my hand to something new for fear of less than desirable results. Turning this wonderful vintage 6' long chippy window frame into a sign intimidated me for a couple years, but I finally found the courage to make it happen and am so happy with how it turned out. Was so much easier than I anticipated, so sharing my process with you in hopes to inspire you to do the same!

Here's the back of the window frame. I simply scraped out the remainder of the old putty so I'd have a nice clean inset for my board.

Since I wanted the board to add as little weight as possible, I used a 4'x 8' sheet of smooth plywood underlayment (SKU #492930) from Home Depot...it's the same product we used and ripped into 6" planks to create the shiplap wall you see it hanging on (see previous post). My hubby and I were able to cut two boards out of the piece so I can swap the sign out on a whim (a girl needs her options, right)? 😊

I compared some chalk paints and colors and landed on Jojo’s Magnolia Home in Shiplap…lol…how could I not? 😊 Have wanted to give it a try...love the color, application, dry time, low odor and how it worked so well with my Alabaster walls (Sherwin Williams SW 7008). Simply painted my board with a couple coats since I wanted a solid backdrop for my lettering.

I know there's probably lots of easier ways to go about creating the stencil for the lettering, but here's the simplest way I could think of using the tools I have. Like so many of you, I love the font that Jojo uses for Magnolia and set out to find a similar one (hers, of course, is proprietary). I used Minion Pro Medium Subhead...it's close enough for me. I created the "sign" as an image in my photo editing program that was the same size as my board and exported the images out to my Cricut Explore Air 2 (since the max cutting size on the Cricut is 12" x 24", I had to be creative and divide the file into segments and only cut pieces of the stencil at a time). This being the first stencil I've created on my Cricut, I tried their adhesive Stencil Vinyl, which I wouldn't use again for this sized project because it was so sheer and hard to position (I'll try a thicker and perhaps reusable stencil film next time). After lots of fussin' and positioning of the stencils, I simply used a flat stencil brush and pounced/filled the letters with black chalk paint. I was just a bit giddy after the paint dried and I was able to peel away the vinyl. Was left with beautiful letters whose edges just had to cleaned up a bit with a tiny paintbrush where the paint had bled (have since learned that I could have sealed the edges of the stencil with a coat of Mod Podge to prevent this).
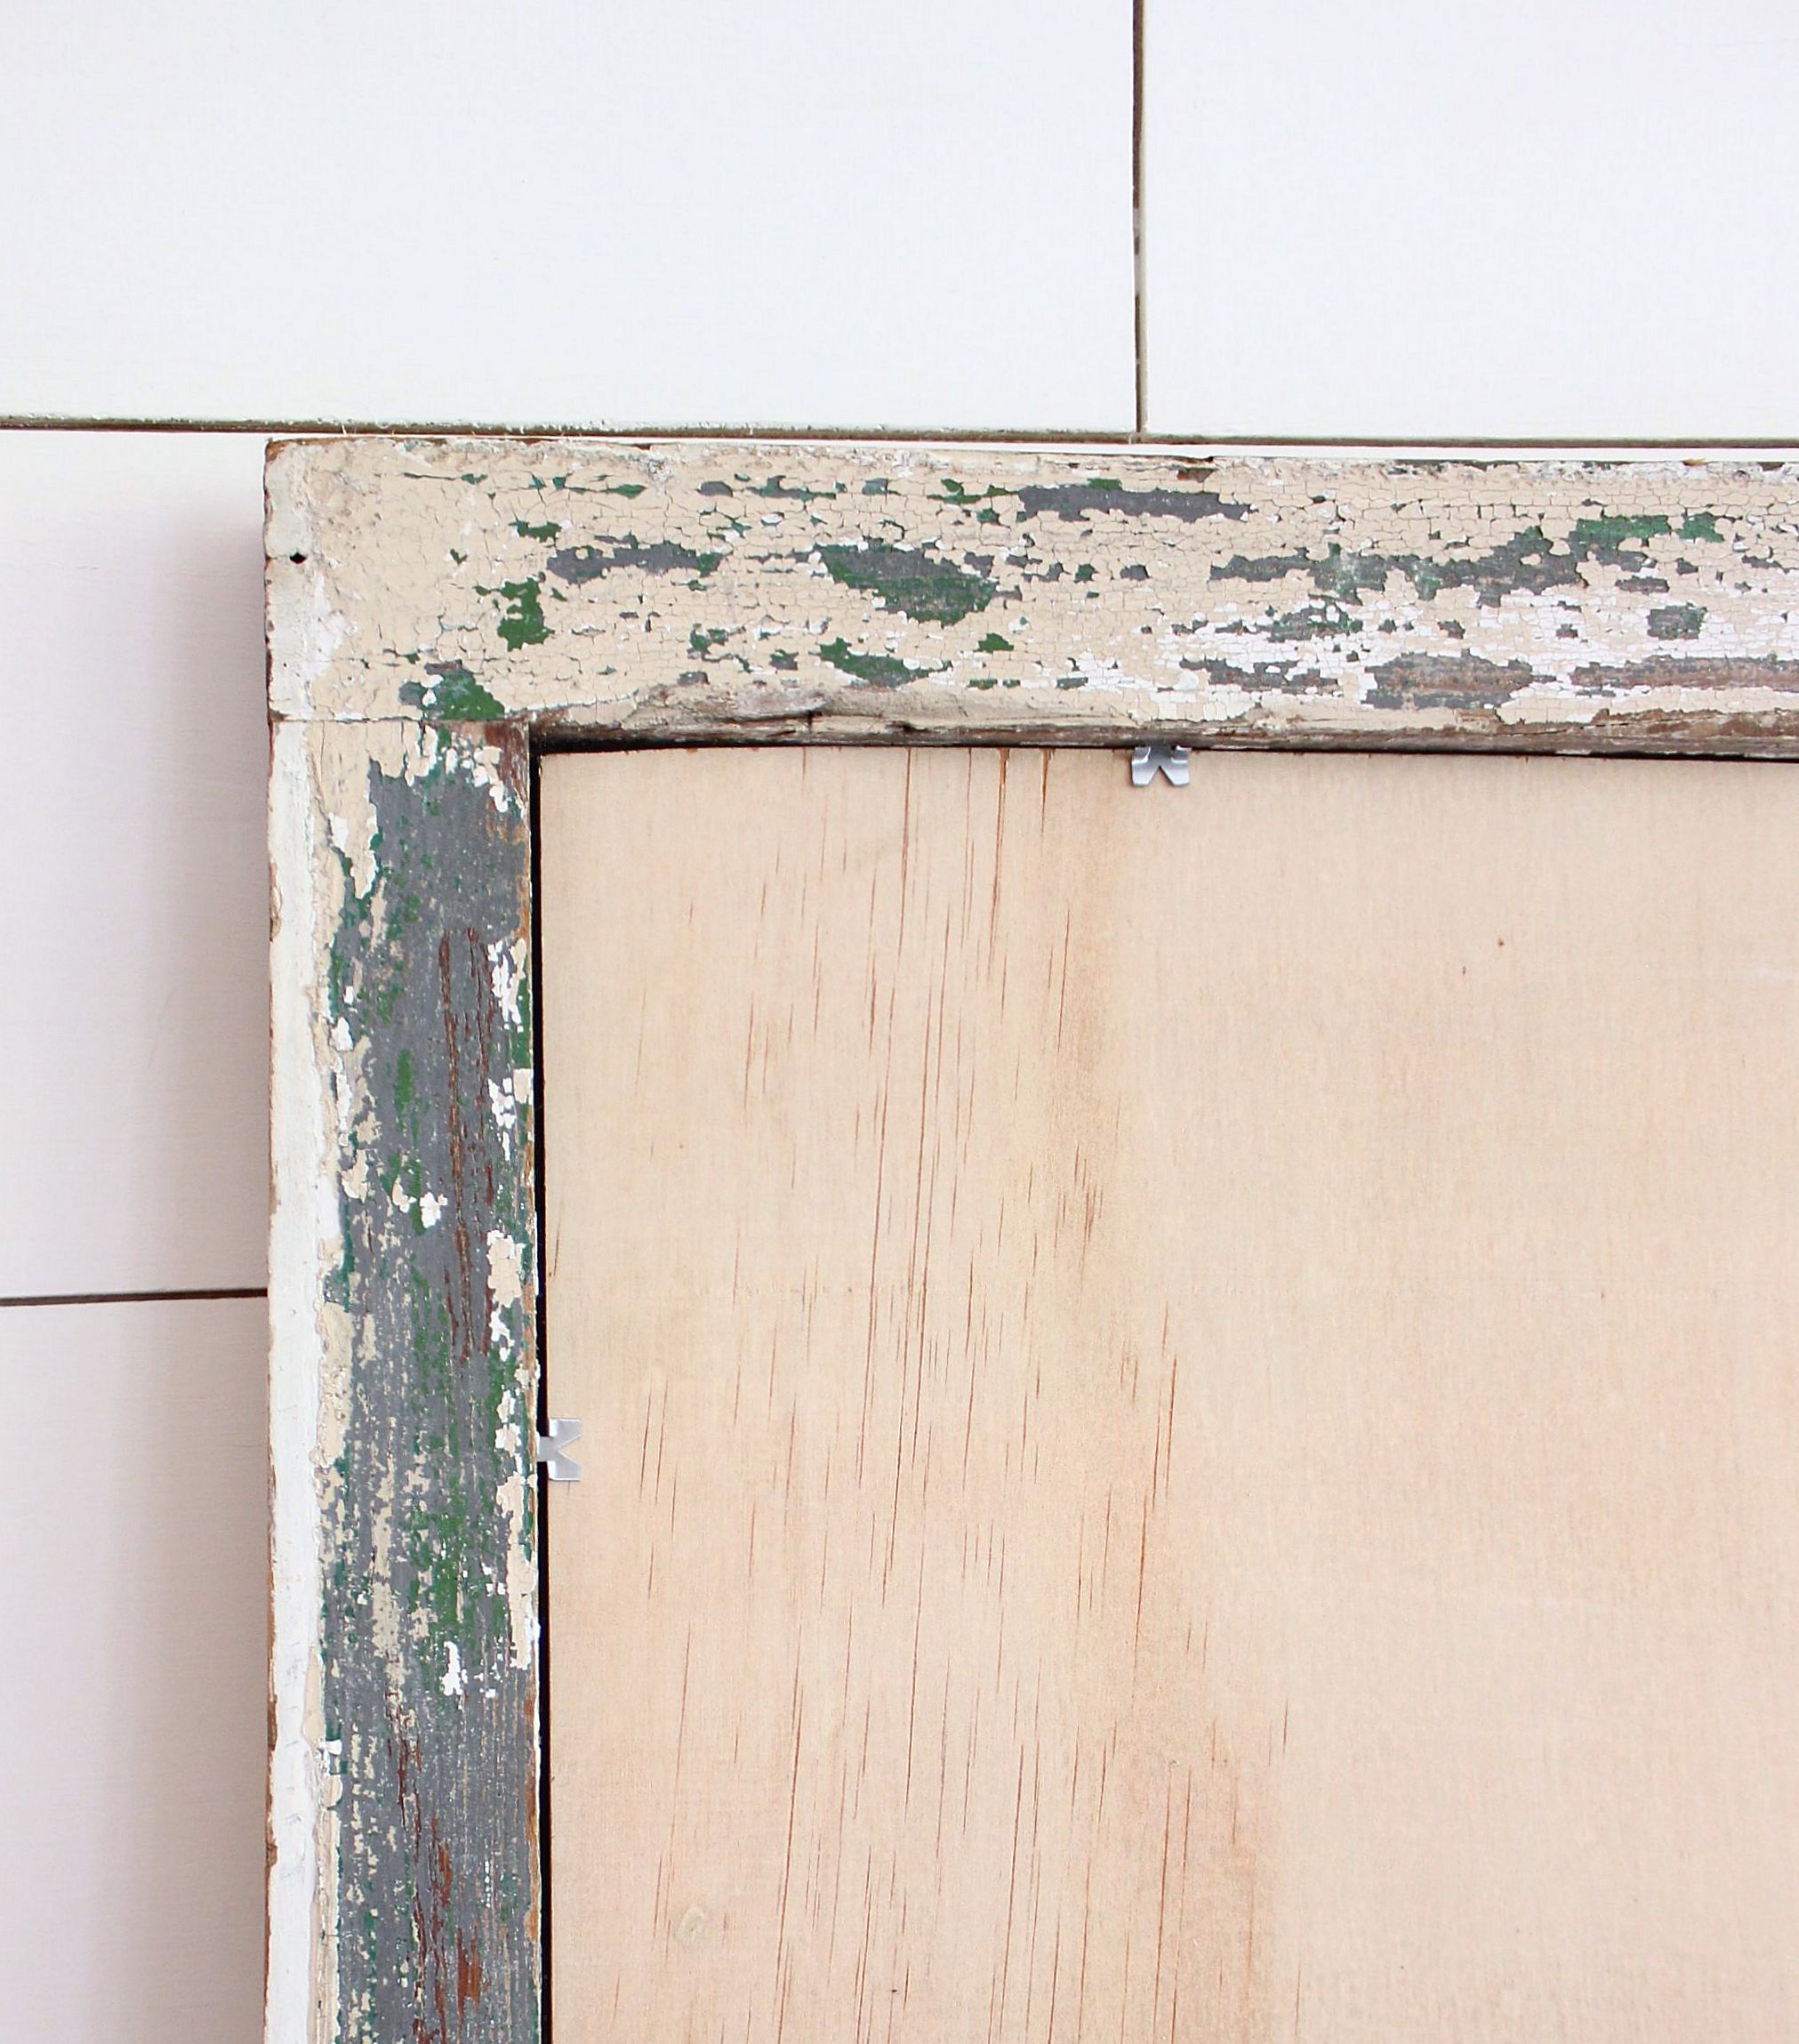
Remember how we cut two pieces of underlayment? To make it super simple to swap the frame out with another sign (seasonally, etc.), I secured the board to the frame by simply using window grazier points every 6" or so by pinching the sign to the frame and pushing them in with a putty knife. My big girl was my second set of eyes as we hung it then celebrated and giggled like a couple of little girls.
Now all that remains is to put into practice that sweet spirit of fellowship and hospitality. I know this verse is used a lot these days, but truly couldn't think of a better way to welcome and celebrate all who gather in our home.
Now these three remain: faith, hope and love. But the greatest of these is love. ♥ 1 Corinthians 13:13